Host Private Maven Repository Using Amazon S3

A private Maven repository is particularly useful when developing company’s internal projects which cannot be shared publicly such as on Maven Central. While there are multiple options for running your own private Maven repo – such as via Nexus Sonatype, there is a simples approach which works very well for small to medium sized companies.

Amazon’s S3 is one candidate for this simple approach. its high availability and the fact that it’s completely managed by Amazon makes it a reliable option. So lets proceed.

I’m going to use a Gradle project to demonstrate the steps but the process should be very similar with Maven as well.

Lets assume there are two Gradle projects – plugin-project and project-crud-api. Plugin-Project to be to installed in the maven repo and used in project-crud-api.

Step 1 – Start by choosing an S3 bucket – existing or new. Add two directories in it with the names “snapshot” and “release”. These will be used to manage release and snapshot versions.

Step 2 – Create a new IAM user which has read-write access to the two directories we just created. Ideally this used should have permission to access only our maven directories for improving system security.

Step 3 – In project-plugin‘s build.gradle add the following code to –

apply plugin: 'maven'
apply plugin: 'maven-publish'

publishing {
    publications {
        mavenJava(MavenPublication) {
            from components.java
            groupId '<your-group-id>'
            artifactId '<your-artifact-name>'
        }
    }

    repositories {
        maven {
            url "s3://<bucket-name>/${project.version.endsWith('-SNAPSHOT') ? 'snapshot' : 'release'}"
            credentials(AwsCredentials) {
                accessKey AWS_ACCESS_KEY
                secretKey AWS_SECRET_KEY
            }
        }
    }
}

Step 4 – Now we need to store our AWS S3 credentials somewhere. Storing them in sourcecode itself is not a good idea as it can get compromised if someone gets hands on your code. Instead we’ll store them in system’s gradle.property file.

Open ~/.gradle/gradle.properties file (for linux) and add following lines in it –

AWS_ACCESS_KEY=<your-aws-access-key>
AWS_SECRET_KEY=<your-aws-secret-key>

We are now ready to publish our first artifact to S3. From terminal execute

./gradlew ​clean publish

and your artifact should be uploaded to S3.

To use artifact form S3 in a project simply define the custom Maven repo in build.gradle –

repositories {
   maven {
      url "s3://<bucket-name>/release"
      credentials(AwsCredentials) {
         accessKey AWS_ACCESS_KEY
         secretKey AWS_SECRET_KEY
      }
   }
}


How To Send Images And Other Files Using AJAX In jQuery

jquery_header

You must have been using AJAX via jQuery for tasks such as sending form data, background commands etc. There is however one thing almost everyone get stuck at least once – sending a file using jQuery AJAX. You you have a form with a simple file type input tag and you tried saving it’s content using, say PHP on server-side, you’ll find that the file input was simply not transmitted and you probably got a ‘undefined index’ error.

Let’s first see why it doesn’t work. By default when you pass something in the ‘data’ parameter, jQuery converts it into a query string of the type specified by the ‘contentType’ parameter. If this parameter is not specified then the default value of ‘application/x-www-form-urlencoded; charset=UTF-8‘ is used. This conversion clearly supports only text data and hence any file type input is simple discarded.

The solution is simple, as specified in the example provided below.

$.ajax({
    type: "POST",
    processData: false,
    contentType: false,
    url: "url_to_server-side_file",
    data: new FormData($('form_selector')[0]),
    success: function(msg){
        //do something;
    }
});

Lets see whats happening here.

  • By specifying ‘processData‘ to false we prevent any conversion of passed data into a query string.
  • Specifying ‘contentType‘ to false prevents jQuery from setting any content type headers.
  • new FormData creates a FormData object containing data of all fields in the selected form. Here ‘form_selector‘ is any arbitrary jQuery selector to your form. For example is the id of your form is ‘form1’ then it will be ‘#form1’.

After this you can receive the file on server-side like it would have been passed normally.

Notedepending on your server’s configuration, you may not be able to send large files using this as there is a size limit of POST and GET messages. POST is the recommended method for sending files as it is less dependent on the client. You may find a setting having name similar to ‘post_max_size’ in your server’s .htaccess file. You can set it to, say 100M, 200M etc. For more information see here and here.

My Photo Gallery

I’ve recently decided to take my passion for photography to the next level. As a first step I’ve setup my photo gallery on 500px.com. I generally do landscape, macro, city and a bit of  nature photography. If you’re interested in photography please take a look at it. Any comments, suggestions, feedback are welcome.

My complete collection is at 500px.com/harshilsharma63. Some of the pics are –

Take a look at my complete collection at 500px.com/harshilsharma63

Photography – How To Perform Focus Stacking In Photoshop

Focus Stacking is a technique where you take multiple photos of the same scene with different parts in focus and then combine them into a single image with everything (or whichever parts you want) in perfect focus. It may sound complex to do but is actually very simple to do in Photoshop.

Lets see how we can perform focus stacking. I have three images with me, each having a slightly different area in focus.

focus1  focus2

focus3

If you open these images you’ll see that the first image has the outer part of image in focus, second image has middle and third image has central part in focus. We’ll now see how to perform focus stacking on these images. I’ll use Photoshop CC for this but the steps should be same for older versions too.

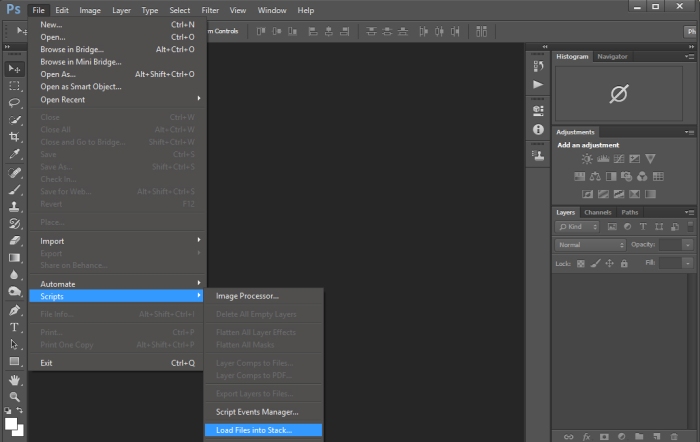
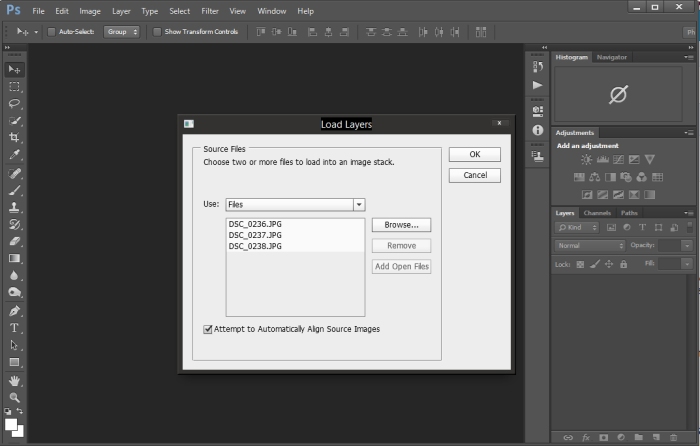
Step 1 – Open Photoshop, choose File > Scripts > Load Files Into Stack… and choose the photos that you want to stack. Make sure to check the “Attempt to automatically align source images” at the bottom of the dialog box. This option aligns images in case there was a slight movement of the camera. Click Ok.

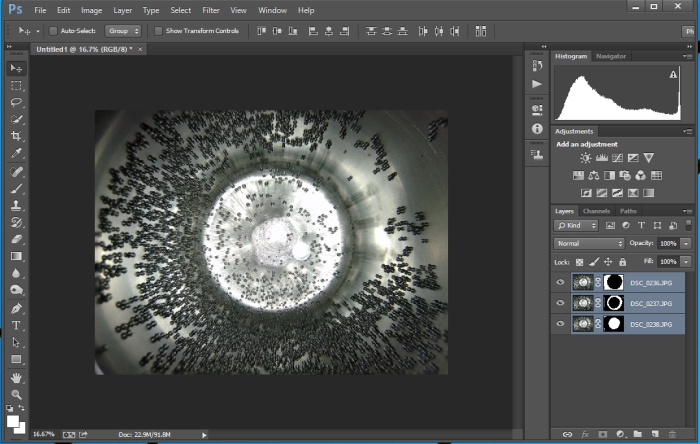
Screenshot (186)

Screenshot (187)

Photoshop will now open the images and load them int a stack.

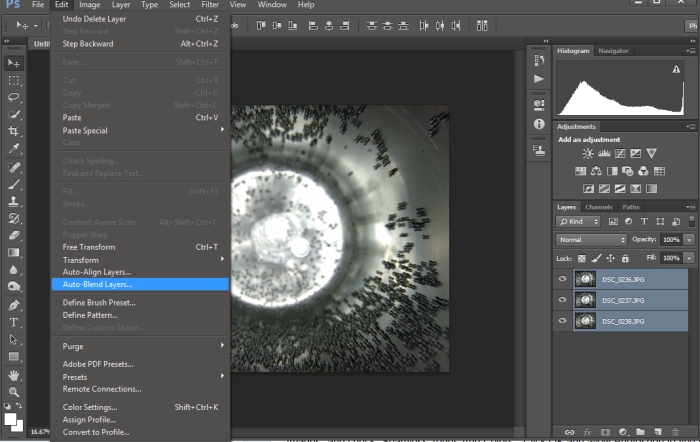
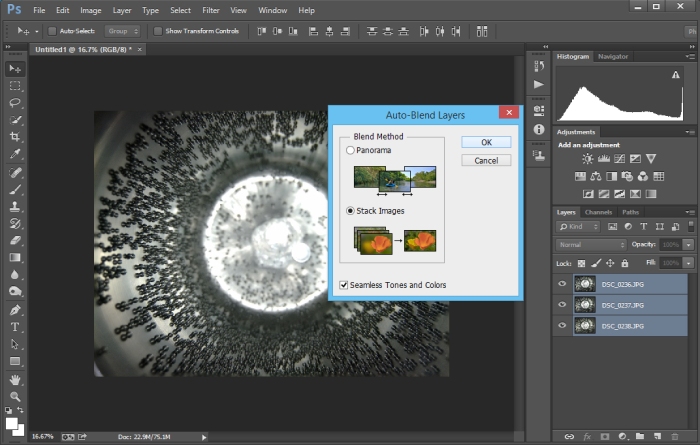
Step 2 – Now select all layers from layers panel and choose Edit > Auto-Blend Layers…. Select “Stack Images” and check “Seamless Tones And Colors”. Click OK and allow Photoshop to find the areas in focus in each layer.

Screenshot (189)

Screenshot (190)

Screenshot (191)

You’ll now see that Photoshop has applied a mask on each layer. This mask generated by Photoshop is used to display only in-focus areas from each layer. Manually creating such mark would have been a difficult job if there were dozens of images.

Final image –

2

You can now flatten layer and save the stacked image in your favorite format.

How To Install CyanogenMod On Moto G 2014

cyanogenmod_header

CyanogenMod is a highly modified distribution of Android operating system. It’s based on AOSP, is available for a wide variety of phones and includes features not found in other Android distributions. If you have an Android phone and you don’t flash CyanogenMod (or any 3rd party ROM) on it, then you aren’t using your phone to its full potential. CyanogenMod offers numerous advantages; both performance wise and feature wise. So many, that it you’ll almost feel like using a new phone. I’ll be writing another post about the various features and advantages of this.

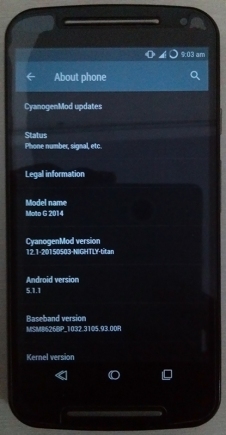
The latest version of CyanogenMod is 12.1 and is based on Lollipop 5.1.1 (as of time of writing this post). Moto G 2014 users can follow the steps provided below to install CyanogenMod on their phone. For other phones users can browse XDA forum for appropriate steps.

Prerequisites

1. Make sure you have a good quality data cable which doesn’t disconnect.

2. Make sure your phone’s battery is fully charged. Do not proceed with a low battery.

3. Make sure you have enabled USB debugging on your phone.

Installing TWRP (skip if you already have this)

Step 1 Download and install the Minimal ADB & Fastboot installation from here –

http://forum.xda-developers.com/showthread.php?t=2317790

Step 2 – Get the latest TWRP img file for titan (Moto g 2014’s code name) from the official download location and place it in the same folder where you installed Minimal ADB & Fastboot (typically C:\Program Files (x86)\Minimal ADB and Fastboot\). rename this file as TWRP.img –

http://dl.twrp.me/titan/

Step 3 – Connect your phone to PC using USB cable. Open Minimal ADB and Fastboot command prompt from desktop (if you made a shortcut) or from installation location. Type ‘adb devices’ and press enter. If your device is listed that means you have successfully connected your phone.

Step 4 – Type type following commands in sequence –

adb reboot bootloader
fastboot devices
fastboot flash recovery TWRP.img
fastboot reboot

Installing CyanogenMod

Step 1 – Download the latest zip file from here –

http://download.cyanogenmod.org/?device=titan

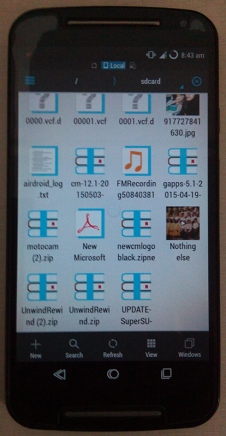
Step 2 – Copy this zip file in the SD card or phone memory.

step1

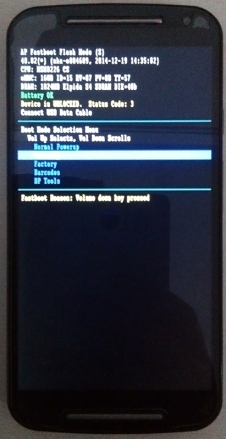
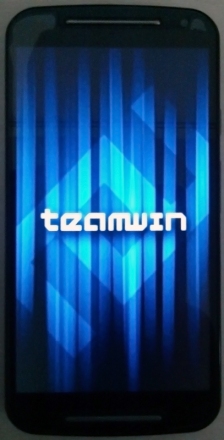
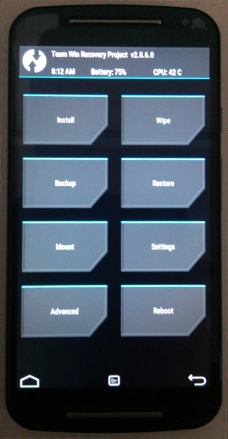
Step 3 – Boot into recovery mode – power off the phone, hold power button and volume down button together for 3 seconds and release the power button. Press volume down key to navigate to ‘recovery’ option and press volume up key to select it. You will now enter TWRP.

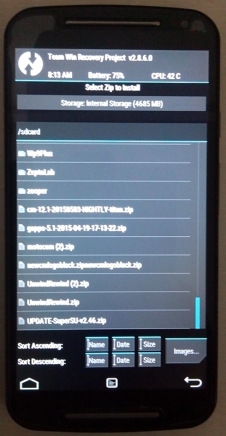
 step2  step3  step4

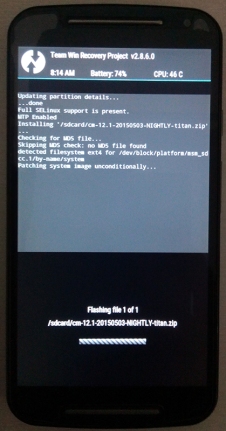
Step 4 – Select Install and select the CyanogenMod zip file you copied in your phone. Swipe the slider at bottom to start flashing the zip file.

                   step5         step6

Step 5 – Wipe Cache and Dalvik (you’ll see buttons for that in TWRP itself after flashing is complete).

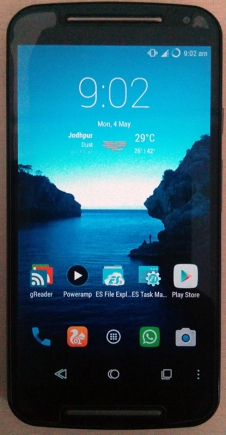
Step 6 – You have successfully flashed CyanogenMod. All that’s left is setup. Now remove the SIM card (VERY IMPORTANT) and restart the phone. You’ll see the Cyanogen logo. The first boot takes time so be patient and don;t worry. You’ll see the familiar “Android is starting… Optimizing apps…” screen. Wait for it to complete. You’ll now see the CM setup wizard. Log in to you Cyanogen account  (create one if you don’t already have it).

Step 7 – That’s it. Congratulations, you now have the world’s most used 3rd party Android ROM!

                    10        11

Installing GApps

CyanogenMod installation doesn’t come with Google Apps (GApps for short) pre-installed. You see, CyanogenMod is an open software, promoting freedom in every sense. You get the freedom of choosing whatever ecosystem you want – Google Play, Amazon, or some other store. That’s the fun of open source.

But lets face it, many apps are only available on Play Store and you may be well dependent on some Google service such as Hangout or G+. You can still flash gapps on your phone and get all the default Google Apps back to life. Here’s how to do so –

Step 1 – Download the latest version of gapps from here –
http://wiki.cyanogenmod.org/w/Google_Apps

Step 2 – Copy the zip file in you SD card or phone memory.

Step 3 – Reboot into TWRP recovery (just as you did when flashing CyanogenMod). Select Install, select the GApps zip you just copied and flash it.

Step 4 – Reboot your phone and you’ll be ready to go with all default Google Apps available. IF there is some app that you didn’t find, download it from the Play Store.

Known Issues and Solutions

1. I keep getting “xxx has crashed” or “xxx has stopped working” after I first started the phone.

Solution – I told you to remove the SIM card when starting the device for the first time. Can’t you read the instructions properly?

2. Various sensors like the accelerometer, compass, etc are not working.

Solution – Open CyanogenMod File Manager. go to settings > General Settings > Access Mode and select Prompt User mode. Go to root/data/misc, remove the sensors folder and reboot.

All credit and big thanks goes to XDA members luca020400 and LuK1337 and the whole CM team for creating such a wonderful ROM! You can browse the official XDA thread for latest updates.

Photography – How To Fix Leaning Buildings using Photoshop

If you’ve been taking photographs for some time then you must have experienced (sad if you haven’t) that buildings or any tall structures near the edges of frame appear leaning. An example of this is a picture I took on a recent trip to Delhi –

before

You can see that the India Gate is leaning left by quite some degrees. You can also notice that the part of the building nearer to the right edge is leaning more than the opposite part. This is because of the very reason such leaning happens – lens distortion. Lens distortion causes parts of the image nearer to the lens edges distorted due to the optical qualities of the lens. The farther the object or the wider the field of view, more prominent this effect becomes.

Now lets see how we can fix images affected with this. I’ll be using Adobe Photoshop CC but the same steps should apply to older versions too.

Step 1 – Open your image in Photoshop.

Step 2 – Select Filter -> Camera Raw Filter from the menu bar or press Shift+Ctrl+A.

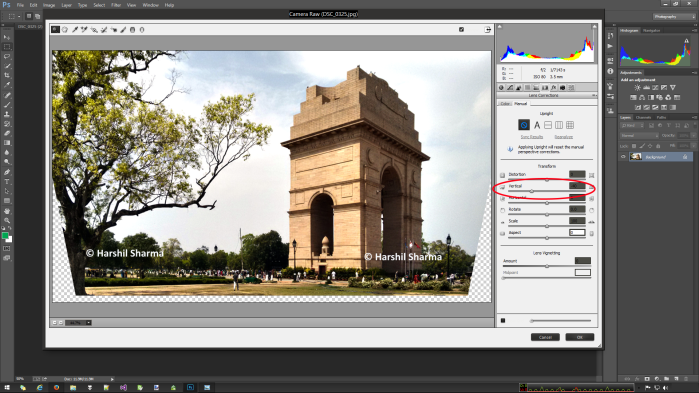
Step 3 – Switch to Lens Correction tab (6th icon from left) in the right panel. Switch to Manual in the tab that opens below.

Step 4 – Slide the slider labeled Vertical left or right depending on which side is you image leaning. Slide left if your image is leaning left and right if your image is leaning right. Click OK to apply.

Screenshot (181)

The end result after cropping –

after

This may leave blank areas in the image. You can either use content aware fill to generate pixels if there isn’t much variations in image or crop those areas out. You may also want to decrease image’s height a bit to compensate for the vertical stretch introduced. You can use Transform (select then press Ctrl+T) for that.

AAA : Awesome Android Apps – Songify

Untitled

Ever wanted to kick that boring, sad mood out of the group, or wanted to just have rib tickling laughter with no ideas in mind? If you answered ‘yes’ then Songify is the solution.

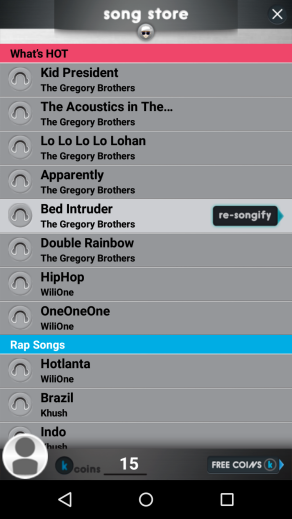
Songify is a cool app that converts almost any voice into a fun song. You simply record your voice into it and it instantly converts it into a song, applying music and beats to it. There are a variety of music choices to apply and the results are just amazing. And it’s not a dumb app like may others. It carefully extracts sentences from your voice and add them in perfect positions into the music. You won’t be listening to some random cheap effects.

The app is developed by smule can can be downloaded from GooglePlay or AppleStore.

Screenshot_2015-04-19-09-13-31   Screenshot_2015-04-19-09-13-49

Screenshot_2015-04-19-09-14-06   Screenshot_2015-04-19-09-13-41

AAA : Awesome Android Apps – Camera FV-5

Camera_fv_5

Have you ever felt that your Android phone’s camera is too restrictive or has too few features? Or probably you miss your DSLR every time you use your smartphone to take a picture? Well, you don’t have to stick around with the stock camera as there are many 3rd party camera apps available. While most of the are aimed at simplicity or including as many styles as possible, there is one built specifically for bringing all those DSLR features on your smartphone.

Camera FV-5 by FGAE Studios is THE most feature-full camera app available for Android. With features ranging from manual exposure to shot bracketing and intervalometer you can use your DSLR skills on phone camera too to get some stunning shots.

The major features of this application are –

  • Ability to lock focus and exposure individually. Very useful for panoramas.
  • Exposure bracketing supporting up to 7 shots with difference of up to 0.07 EV for taking beautiful HDR images.
  • Long exposure support with 1, 2 and 5 seconds build in and custom timer available.
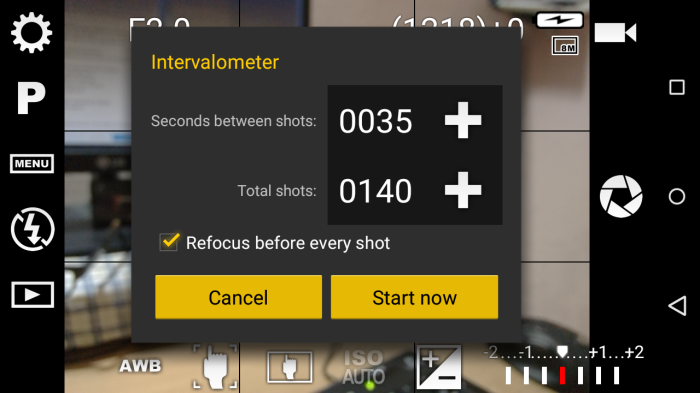
  • Intervalometer for taking time-lapse shots. Supports up to 9999 shots.
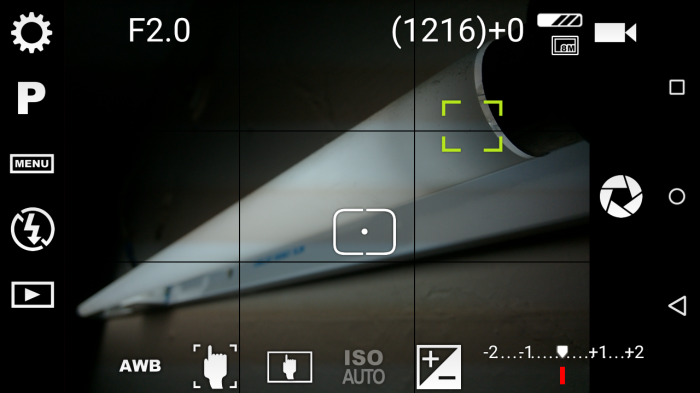
  • Set two independent points – one for focusing and other for metering.
  • Multiple focus modes including macro, infinite, continuous, touch to focus.
  • Multiple metering modes including grid, point, center and touch.
  • RAW support on supporting devices.
  • DSLR style viewfinder with summary of all parameters conveniently available.
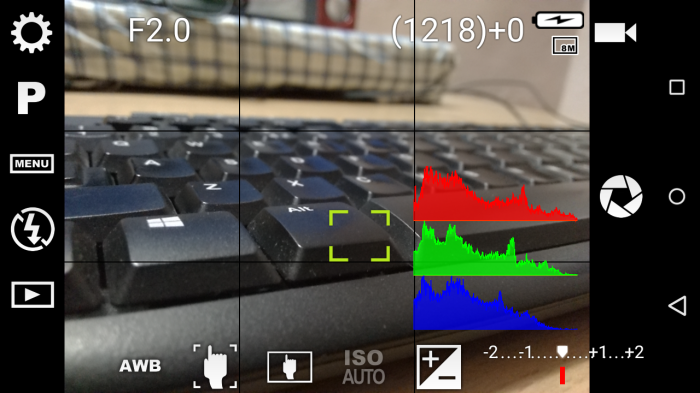
  • Live histogram support including RGB and luminance support.
  • 9 different composition grids available.

Some screenshots of the app

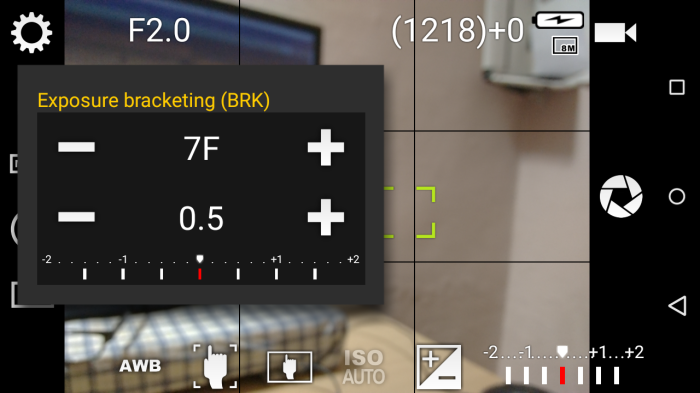
Shot bracketing. Capturing 7 shots with a different of 0.5 EV in exposure –

Screenshot_2015-03-10-03-13-11

Live histogram in RGB mode –

Screenshot_2015-03-10-03-10-37

Independent reference points for focus and exposure. Green point is for focus and the white point is for exposure. Both can be placed independently –

Screenshot_2015-03-10-03-20-54

Intervalometer, for taking time-lapse video. You can also combine this with HDR –

Screenshot_2015-03-10-03-13-42

The most beautiful and probably the most powerful feature though, is the ability to all these features together in any way you want. Use intervalometer with shot bracketing for HDR time-lapse video. Combine that with exposure and white-balance lock to compensate for changing light scenarios. Or how about long exposure HDR? With Android Lollipop becoming more available and more mature its powerful camera features such as RAW support and full manual focusing and exposure are sure to come in this app too.

You can download the app from Google Play and visit the official website here. There is also a very detailed guide of the app on the official website.

How To Use OpenCV In Qt

2

If you ever had been interested in image processing anytime back, chances are high you did head of OpenCV. It’s an open source and highly optimized C++ based computer vision library developed Intel’s Russian research labs. It’s easy to learn and extremely powerful. Now chances are high you also must have heard of Qt framework if you ever wanted to develop a GUI application in C++. It’s an open source, cross-platform C++ framework that’s used globally to develop rich cross-platform applications. It also supports GUI features much easier to learn and use as compared to the Windows only MFC.

For an image processing application in C++ the combination of OpenCV and Qt can prove to be very effective. You can easily use OpenCV from Qt itself (the Qt Creator IDE to be precise). Let us see how can we do that.

This is assuming you already have OpenCV and Qt downloaded. If not, head over to this and this link to get them

Step 1. Install OpenCV by extracting (Linux users) or running the executable (Windows users). Then follow the instructions from OpenCV documentation here to perform the initial setup.

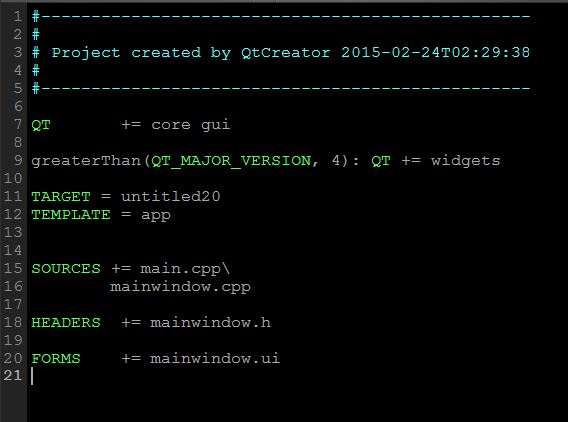
Step 2. Open Qt Creator and create a Qt application. Open the .pro file corresponding to the project. It will be listed on the projects panel as the top most file in project. It will look something like this.

1

Step 3. Add the following lines at the end of the .pro file –

INCLUDEPATH += C:\\OpenCV\\opencv\\build\\include
LIBS += C:\\OpenCV\\opencv\\build\\x86\\vc12\\lib\\opencv_core249d.lib \
        C:\\OpenCV\\opencv\\build\\x86\\vc12\\lib\\opencv_imgproc249d.lib \
        C:\\OpenCV\\opencv\\build\\x86\\vc12\\lib\\opencv_highgui249d.lib \
        C:\\OpenCV\\opencv\\build\\x86\\vc12\\lib\\opencv_ml249d.lib \
        C:\\OpenCV\\opencv\\build\\x86\\vc12\\lib\\opencv_video249d.lib \
        C:\\OpenCV\\opencv\\build\\x86\\vc12\\lib\\opencv_features2d249d.lib \
        C:\\OpenCV\\opencv\\build\\x86\\vc12\\lib\\opencv_calib3d249d.lib \
        C:\\OpenCV\\opencv\\build\\x86\\vc12\\lib\\opencv_objdetect249d.lib \
        C:\\OpenCV\\opencv\\build\\x86\\vc12\\lib\\opencv_contrib249d.lib \
        C:\\OpenCV\\opencv\\build\\x86\\vc12\\lib\\opencv_legacy249d.lib \
        C:\\OpenCV\\opencv\\build\\x86\\vc12\\lib\\opencv_flann249d.lib \
        C:\\OpenCV\\opencv\\build\\x86\\vc12\\lib\\opencv_features2d249.lib \
        C:\\OpenCV\\opencv\\build\\x86\\vc12\\lib\\opencv_nonfree249d.lib

Notice the double slash instead of a single slash. I am using Visual Studio 2013 so I mentioned vc12 folder. You can use vc11 or vc10 for Visual Studio version 2011 and 2010 respectively. Also notice the ‘d’ at the end of each file name. It indicates that the libraries are for debug mode. If you want to deploy your application use the files without the trailing ‘d’.

Select Build menu > Clean Project. Then select Build > Run qmake.

That’s it. This is all you need to do to make Qt identify OpenCV. Test it by running this short program.

#include 
#include <opencv2/opencv.hpp>

using namespace cv;

int main()
{
    String imageSrc;
    Mat image;

    std::cout << "Enter path of an image file: ";
    std::cin >> imageSrc;

    //opening image file
    image = imread(imageSrc, IMREAD_COLOR);

    if(image.empty()){
        std::cout << "\nUnable to open image.";
        return -1;
    }
    //displaying image
    namedWindow("Test Image");
    imshow("Test Image", image);

    //for preventing instant closing of image window
    waitKey(0);

    return 0;
}

If the image opens, you have successfully configured OpenCV for Qt. You will need to add those lines to .pro file for every new project you make.

How to quickly and easily add dummy entries in database

Untitled

If you have been programming for a while you’ve definitely been in a situation where you are developing something that accesses database but there are not enough entries or no entry that all in the database. You cannot verify results unless there are some entries in the database. So what can you do in this situation? Manually adding entries is okay for a few rows but that doesn’t give you the reality of a whether the application will work in a full-scale database.  there are tools available for creating such a dummy entries. While most of them are paid or limited in the number of rows they can add, the wonderful tool at generatedata.com is both free and open source.

You need to download the php application and run it on your local computer. The website is only for demo purpose and allows only 100 records. As as might have guessed you need a php server for this such as Xampp.

Step 1. Download the application as a zip file from the github repository – https://github.com/benkeen/generatedata .

Step 2. Extract downloaded zip file and copy the contents into the server’s htdocs folder

Step 3. Start your server and open the downloaded app in your browser.

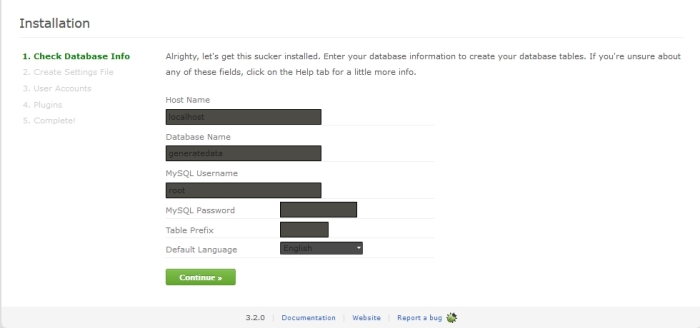
step 4. The application will ask you to configure itself.

1

You need to create a new database in your local mysql instance where the application will store all its configuration data. Now enter the name of the created database and click next. Fill the other details asked and proceed. The application will now download various plugins from the Internet and store them in the database you provided.

2


Step 5. With this you complete the installation. You can now create dummy data for your database using this tool. Let us see how you can do that.


Steps to generate dummy data

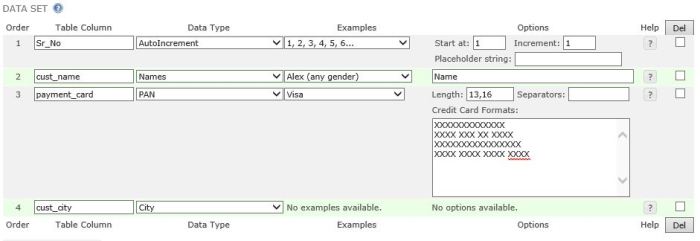
Step 1. Provide all the field names. Then provide the type of data for each field. You can select from the various predefined types such as numbers, a defined range, date, credit card numbers, locations, user-defined list and even name and surname of specific gender.

3


Step 2. Select the application type for which you want to generate the data. You can create the fields for mysql database, JSON, HTML table, Excel file, CSV and many other formats including xml.

4


Step 3. Provide the database name in which you want to insert this data. The database name will only be used only for creating the script and not for performing any instructions so you can be safe. Provide whether you want to insert the new entries for update the existing one. Yes it even supports updating the existing entries. Isn’t that cool?

5


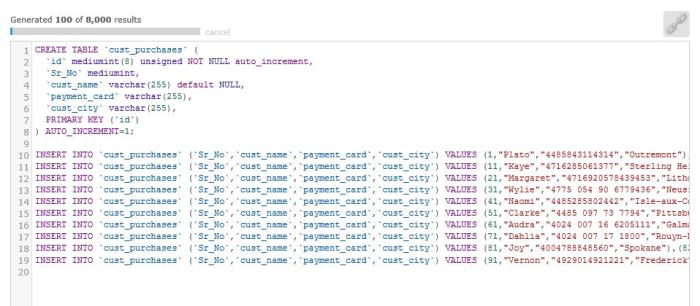
Step 4. Enter the number of entries you want to be created and hit generate. That’s it. You’ll be presented with the script for entering be generated data.

6


This tool is free, easy to use, effective and open source. No advertisements or any fee applicable. And the best of all it runs on your own computer so you do not need any Internet connection for generating such data. It also provides developer documentation for creating new data types and new export formats, making it a highly extensible and customizable solution.